~ Makeup Artist Kit Building, VERY BASIC ~
September 30, 2009
I know many people are curious to know just how much stuff a Makeup Artist needs to have. Well, it’s actually very little. Now, depending on the kind of makeup you are doing and your personal preferences..it can end up being a lot;)
Personally, I do mostly everyday looks and some special occasion makeup (Weddings etc. ) . I don’t do runway or fashion magazines. My professional kit is rather tame compared to most, but my personal kit…welll, that is a whole different animal;)
If you are just starting out in makeup, and maybe offering makeup looks for your family and friends, here are a few things I would suggest. This is a mix of budget products as well as some pricier items, but ones that I believe are worth it. Just my opinion. Substitute as you feel necessary. These are just ideas based on affordability and not necessarily what I have in my kit. Most items you can readily find at places like TARGET, ULTA, and drugstores. Other items can easily be ordered online.
NOTE – I will do a blog post ( at some point) highlighting my personal kit for those interested as well as my storage systems etc. Please be patient as I currently taken on a new position as a Beauty Advisor with a cosmetics/skin care line in addition to Freelance artistry and private makeup lessons. I update as often as possible and appreciate every email and inquiry.
HAND SANITIZER – NO KIT CAN BE WITHOUT THIS! Buy ANY kind, ANY where but HAVE IT! 😉
Gentle Cleansing/Makeup Remover Wipes (Neutrogena)
Moisturizer (Cetaphil)
Primer (Monistat Chafing Gel)
Gentle Eye Makeup Remover (BOOTS No7 makes a great one in the Botanical line)
Invisible Setting Powder (Ben Nye)
Waterproof Eyeliner in Black & Brown (Makeup Forever Aqua Eyes)
Clear Lipliner ( Urban Decay Ozone)
Clear Lipgloss ( Any kind in a squeeze tube will do)
A good set of Brushes (Sigma)
An excellent non-tinted eye primer (Two Faced Shadow Insurance)
A lip moisturizer (Vaseline works wonders!)
Plenty of Q-tips, cotton pads and disposable makeup sponges.
Plenty of disposable lip brushes, mascara wands.
Eyelash curler, Spoolie brush, Tweezers, Small cosmetic style scissors and DUO adhesive for lashes.
False Lashes ( Model21)
A Good volumizing/lengthening mascara (Maybelline Great Lash)
Clear Mascara (To prep lashes for more volume or to set brows)
Concealer, Foundation, Blush, Lipcolor and Eyeshadows (Coastal Scents Pallets)
Bobby Pins for pinning back pesky hair;)
Foundations (Coastal Scents Concealer Pallet)
* This pallet can be used for beginners who cannot make a large investment in multiple foundation shades. It is cream based and can be blended with moisturizer to make it more of a tinted moiturizer for those who do not want full coverage.
* Cinema Secrets (for those with a bit more to invest) makes some of the best foundation pallets available. HD friendly, convenient sizes, and great versatility. Around $20 each, 5 shades included and pre-grouped into various levels or warm, cool and neutral tones.
And if you want something handy to carry it all in, check your local Target, Wal_Mart or Craft store for a convenient craft tote. Small clear pencil boxes are ideal to separate items (ie; Lash/brow items in one, lip products in another , disposables in yet another etc) . Personalize it how you like.
This is JUST a basic kit for beginners. For my personal recommendations, items I enjoy and use and industry faves, check out the MUA Kit Suggestions and My FAVES link in the sidebar menu for info and updates as I get to them;) If you are a MUA with a review/suggestion, I would love to hear from you!
So, with that…go out and start building something BEAUTIFUL!
KristineMarie
~ RIMMEL Soft Kohl Eye Kajal Pencils, A Review ~
September 26, 2009

What: Rimmel of London, Soft Kohl Kajal Eye Liner Pencils. (NON-WATERPROOF)
Where: Can be purchased at Target.com, CVS.com, Ulta.com
Cost: Averages $3.75 USD
Packaging/Presentation: 1.2 gram pencil with removable cap
Purpose: Provide definition to upper and lower lashlines. Make eyes look larger or smaller depending on use.
Application: Very easy. Pencil is creamy and meant to be smudged in for a softly defined look. No tugging or pulling. I advise small dashes close to lashlines and smudging with a small dense brush or qtip. Can be set for longer wear with an eyeshadow in a similar shade for a soft blurred effect.
Wear: Wears well, especially when set with a powder shadow in a similar shade.
Recommended for: Soft and natural looks, smokey eye looks, everyday wear, those who enjoy variety in colors, affordability and accessibility. NOT recommended for use on waterline as it is not waterproof and will run.
Purchase Again? I may purchase again. Not a *must have* for me with so many comparable brands available, but when on offer for BUY ONE, GET ONE FREE it is an unbeatable deal for pencils you can use daily.
Tips:
*A sharper line creates a thinner application and a blunt pencil will create a thicker line.
*You will need a sharpener for this pencil.
*Keep sanitary by lightly spritzing the tip with at least 70% Isopropyl alcohol once weekly and allowing to dry before recapping.
Jet Black-061 , Sable Brown-011, Green Shimmer-035 and Denim Blue-021

Several other colors are available. I also purchased the PURE WHITE-021 and use it in the inner tear duct area to lighten and brighten eyes on tired days.
Kristine Marie
~ Tips to Wake Up A Tired Face ~
September 24, 2009

Have you ever spent just a liiiiittle too much time playing late at night?
Sure you have. We ALL have;) So, here are a few quick tips to helping you look a bit brighter and more awake when it’s time to go back to work in the morning;) Try a few and wow yourself with results!
* Wake up your skin with a good morning rinse of warm water and finish up with COLD water. This will get your blood circulating, tighten your pores and get your skin ready for some glowing.
* Add a luminizer to your foundation or moisturizer to give a hint of radiance to your “stayed out too late” skin.A few drops of BENEFIT HIGH BEAM pink luminizing liquid (($24 USD at Sephora and Ulta stores) blended into your product should do the trick!

* Optional Step – Benefit also makes a fabulous product called Lemon-aid. It is described as ” a soft yellow correcting cream that instantly hides redness and discoloration on your eyelids.” I just call it a little miracle. Found at Sephora for $20 USD. Also can be used as an eyeshadow primer for those multi-taskers out there;)
* Conceal the evidence… but beware of the reverse raccoon effect. Try to stick with a concealer that is no more than 1 shade lighter than your skin. Applying it with your fingertips will warm the product and allow it to better blend into your skin. Using your ring finger ( as it is the weakest of your fingers) gently pat the concealer in to problem spots and dark circles. Set with a very light dusting of powder. I use BEN NYE Nuetral set (See Reviews in the side menu for more information——->)
* Lighten up! Your eyes that is. Open tired eyes with a soft WHITE eye kohl pencil by lining the lower waterline. You can also add a touch the the inner tear duct area and gently blend it in with your fingertip. This makes eyes not only appear brighter, but larger and more open. Let the sun shine IN! RIMMEL of London makes a creamy soft eye kohl for around $3.50 USD found at CVS, ULTA and TARGET stores.
* Use a highlighter such a Benefit Eye Bright ($20 USD at Sephora.com) to wake up and life tired eyes. Dab a little in the inner corner of eyes, just under the eye, just under the browbone and to on the outer corner of eyes for a quick lift and bright, wide awake look. Another affordable option is the Sally Hansen all over Face brightener for around $8.99 USD (CVS and Ulta)

* Add some blush. Using your fingers, dab a hint of your favorite pink toned cream blush or even lipstick to your cheeks. Don’t overdo this. Just a touch onto your apples and using 2 fingers (again, to warm up the product) blend in and back toward your temple. Pink adds a healthy look and is universally flattering on everyone. Sally Hansen makes great cream blushes inspired by the makeup artist Carmindy ( from TV’s WHAT NOT TO WEAR show) and the color BLOOM is perfect for everyday. Can also be used over a lip balm for a hint of tint to get the most out of your $8.99 USD investment.

* Show your smile and follow up with a nude or pink lipgloss. You can find some inexpensive mineral glosses in several beautiful shades at eyeslipsface.com. They are paraben free and have vitamins A and E , and are a steal at only $3 USD, so you can stock up. Au Natural and Pageant Princess are beautiful shades I love. http://www.eyeslipsface.com/products_minerals.asp?dept_id=1396
* The smile just lifts the face and puts everyone in a brighter mood!

* Drink water! Flushing your bodys toxins and hydrating properly will get your skin back on track. Until then, the steps above will help you fake it until you make it there;)
So there you have it. A few tricks to add to your routine when you play hard and work hard. Enjoy these tips and try one, or all of them to wake up the overtired party girl in you;)
KristineMarie
~ Bridal Makeup, Flawless Foundation ~
September 23, 2009
In this Part Two of Bridal makeup tips, I will give tips & tricks on creating a flawless foundation for those who are braving the mission of self makeup on the Big Day. Please view my post on Bridal Skin Care tips as a starting point:
https://kristinemarie.wordpress.com/2009/08/02/bridal-makeup-tips-skin-prep/
After all, no amount of makeup in the world will compare with healthy radiant skin;) Ok, here we go….

Know your skin type:
The first step in choosing a foundation is knowing your skin type. Is your skin very dry and flaky? Is is very oily with a lot of shine? Is is a little of both in certain areas?Sensitive/acne prone? Is it just fine and dandy aka normal? Knowing the type of skin you have is essential to choosing the right formulation of foundation for that special day.
Know your undertones:
You have heard the terms “Cool” and “warm” used in describing skin tones, right? Well, if you aren’t sure what undertone you have , take a look at your wrists. Yes! Your wrists. If the veins appear to be Blue and you have other factors such as being likely to burn in the sun and pinkish color in your face or chest area..then likely you are a “cool”. If your veins are more Green and you have good luck in the sun ( tan well) and have more hints of yellow or peach in your skin , it is most likely you are a “warm”.

Pink or yellow undertones?
Know what you want:
It is essential to determine what kind of coverage you will want for your wedding day. While most automatically think a full coverage is a no-brainer, it simply is not necessary for many. Full coverage foundations can often feel heavy and cover the true radiance of your natural skin. In doing this, you look less like yourself, and more like someone who is simply covering up with makeup. Unless you need a full coverage foundation for excessive skin damages or flaws, consider a medium , lighter coverage or sheer coverage foundation. Skin is in!
You will also need to consider if you want cream or liquid, or powder.
* I STRONGLY suggest a cream or liquid foundation for long wear and a natural look.
Also consider the “finish” you desire. Finishes vary from Matte ( no shine at all) to Dewy ( think morning dew!).
Getting the perfect match:
Armed with this information, I would HIGHLY suggest going to a makeup counter to be “matched” for a foundation for your wedding day. It is certainly easier than spending hours in drugstores trying to guess, and a heap of dollars in products that you later find don’t really work. There is nothing worse than bridal photos of a beautiful woman with a face that is clearly an unnatural color, texture or doesn’t match the skin on her neck and body at all.

At the counter:
Tell the advisor matching you what you want (sans SPF if possible as SPF tends to have negative effects on flash photography) and also get a concealer (if needed) to compliment the foundation. Try it on and go outside in the natural daylight to make sure it blends seamlessly. Department store lighting can be deceiving.
*Options vary, but Estee Lauder, MAC and Clinique offer excellent foundations in a variety of colors, coverages and finishes.
Before applying foundation:
After cleansing, pat dry gently and apply moisturizer all over the face in upward strokes. If needed, apply an eye cream as well for extra hydration in that area. Then apply a lip balm. Allow about 10 minutes for your moisturizer to really set into skin. Avoid products with SPF as the properties in them can cause an adverse effect with flash photography.
Next, you will want to apply a good skin primer to your skin as it will give your foundation a good base to hang onto providing smoother application and longer wear. Apply a dot to forehead, cheeks and chin and blend well.
* Among industry favorites are primers such as Photofinish by SMASHBOX and Mac Prep & Prime

Application:
Now, apply your foundation. You can use whatever method you like best. Foundation brush, cosmetic sponge, stippling brush, kabuki brush, fingers, blender sponge…whatever works best for you.
*I prefer a large stippling brush ( also known as a skunk brush due to the 2 tone colors of black and white bristles) as it offers a lovely airbrush effect to liquid foundations. For cream foundations, a kabuki style brush offers a lovely finish.

Next, apply your concealer. Do not overapply. Simply press in with your fingertips to areas of concern and pat lightly to blend. Use a light sweep of powder on an eyeshadow blending brush to gently set the concealer. Do not powder the rest of your face yet….
*Using the fingertips is great because the warmth of your skin will warm the product making blending seamless. A light powder is essential to make concealer last. I prefer BENEFITS powderflauge or MAC Prep+Prime powder for this.
I hope these tips prove helpful and I will be following up with Part 3 in this series very soon. It will address blush, setting powder, filling in brows and highlighting. Stay tuned;)
KristineMarie
~ Using MAC Pigments ~
September 19, 2009
Pigments are basically highly condensed cosmetic powders. Most commonly known for their extreme colour payoff in eyeshadow use, they are not often enough used to their full potential. Here are a few basics on how to maximize the use of your pigments, followed by where you can purchase them.

Eyeshadow – Used dry they are true to colour and long lasting when used over a good eyeshadow primer. Use like any other loose shadow making sure to tap excess off your brush before applying. Use wet (do not soak, just dampen brush with water, Fix+, Visine or a mixing medium) before or after picking up colour) to maximize the vibrancy and staying power of your shadow.
Eyeliner – Again, use a mixing medium (listed above) to dampen brush. Pick up colour, tap excess and line those peepers.
Eyebrow Filler – Use dry with your favorite brow filler brush, tap off excess, and fill in brows. Add a touch of a highlighting colour just under the arch of your brow for an immediate eye lift. Use a colour one or two shades lighter than your brows for a natural look, or go deeper or more exotic for a night out.
* Not all pigments are safe for eye areas, so please be sure to check product information before purchasing or applying near eyes.
Highlighter – Use dry for highlighting above or below browbone, tops of cheekbones, center of nose, chin, cupids bow, forehead and or any other area you want to bring attention to. Use neutral/skin tone colours for best results. (MAC’s Provence, White and Vanilla are great for this)
Lipgloss – Mix a hint of pigment with clear gloss, lipbalm or vaseline to make a beautiful gloss. You can also place lip product on first, and tap colour on to your desired intensity. Use any shade you are feeling. Deep shades in berry are hot this fall;)

Blush – Using your ring finger you can put a dot or two of pigment onto the apples of your cheeks and blend in for a beautiful flush. You can also mix with a bit of facial moisturizer and apply with your fingers as you would any cream blush. Use pinks, corals and bronzes for natural results or magentas, plums and reds for something dramatic and bold.
Nail Polish – Simply drop some colour into a clear nail polish to have a perfect match to shadows, blushes or lipglosses. Mix colors for a unique signature colour all your own;)
Body Lotions/Sprays – Just a bit of pigment in your favorite lotion or spray will give your skin a shimmery glow. (MAC’s Vanilla, Jardin Aires and Gold Mode work beautifully for this!)
Hair Products – Pigment added to your hairspray, gel, wax or pomade can give you shimmer, colour or both. Have fun with this;)
** My favorites are MAC’s Vanilla, Gold Mode, and Rose. With these 3 colours, you can complete an entire look.

MAC is known for it’s quality pigments and the 7.5 gram jars you see pictured will last forever at a retail price of $19.50 USD. Unfortunately, many complain that they simply don’t use them enough for them to be worthwhile so hopefully this entry will change that. A few strategically chosen pigments can stretch your cosmetic dollars if you utilize these ideas.
If you want to try other brands you could look into colours offered by NYX, Loreal HIP, Urban Decay, Barry M, Obsessive Compulsive, Medusas makeup , Makeup Forever and more. Samples are also a great, inexpensive way to try pigments without breaking the bank. Deal with reliable seller you trust.
KristineMarie
~ Fall Beauty Trends 2009 ~
September 19, 2009
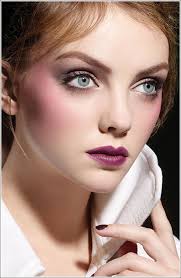
This Fall, the trend predictions are not only in, but are being seen coming to life everywhere. From runways to hallways, the looks are dramatic and rich and offer a sense of mystery…

(Photo by Richard Philips/MAC cosmetics)
Here are a few tips to help you fit in with even the trendiest of runway models and some recommendations for affordable/accessible products that won’t break the bank;)
1. Stick with a sheer matte foundation, or use a light dusting of translucent powder over your current tinted moisturizer from summer. This allows you to still show your skin, but keep the shine away. You want a simple, clean and even canvas for the beautiful color pallet of fall without the distractions of excess shine or too much coverage.

Soft and Sheer Tinted Moisturizer by BOOTS – http://www.us.boots.com/SoftSheerTintedmoisturizer/
Perfect Light Loose Powder by BOOTS – http://www.us.boots.com/PerfectLightLoosePowder/
2. Keep your eyebrows in! Stop plucking. Youthful full eyebrows are all the rage, so fill yours in with a natural colored shadow (1-2 shades lighter than your brows for dark hair and 1-2 shades darker for light hair) and use a brow gel to keep everything in place.
Brow Pencil By Boots – http://www.us.boots.com/BeautifulBrows/
Brow and Lash Groomer by Boots – http://www.us.boots.com/LashAndBrowPerfector/
3. Rich fall colors are in so stick with Greens, Golds and Greys. Play up the season and go deep with the colors. Don’t forget a deep colored liner extended out straight (not curved up in a traditional cat eye) and a coat or two of dark mascara to play up those intense new peepers;)
Stay Perfect Eyeshadow Trio by BOOTS – http://www.us.boots.com/StayPerfectShadowPalette/
Amazing Eye Pencil by BOOTS – http://www.us.boots.com/AmazingEyesPencil/
Lash 360 Mascara by BOOTS – http://www.us.boots.com/Lash360Mascara/
4. Full lips in matte shades of wine, berry and more. Line lips to create fullness and fill in with your favorite new seasonal shade. Play up the plums or rev up your nights with red.

Stay Perfect Lip Lacquer by BOOTS – http://www.us.boots.com/StayPerfectLipLacquer/
5. Blush it on with a darker shade under cheekbones ( 1-2 shades darker than your skintone) and a pop of light rosy color on the apples. Contouring is back, so start reshaping those faces for fall;)
Natural Blush Cheek Color by BOOTS – http://www.us.boots.com/NaturallBlushCheekcolor/
Beauty professionals suggest one focus feature to play it way up, while keeping the other features more toned down. For example, a dramatic eye calls for a more neutral lip, and a Dramatic lip calls for a more neutral eye. You want to command attention, not overpower .
Enjoy these tips and try some new looks on your own, or contact me for an affordable Fall Makeover or Makeup lesson. All lessons include basic instruction sheets, skin care tips, samples, and a personal shopping list to customize your new look as well as your budget. Group Makeup Lessons also available. Perfect for bridal showers or a Ladies Night In.
Kristine Marie
~ Bridal Trial/Girls Night out ~
September 18, 2009
This lovely Bride-to-be initially inquired about a Bridal Trial Makeup session for her upcoming October ceremony. The model has such great skin and features that her daily makeup routine is minimal – consisting only of concealer, mascara and perhaps a lip balm or gloss when needed. Here is the before:

We decided on a traditional bridal look with a med/full coverage foundation to create a seamless match between her face and body. The model has combination skin, light in tone (w/ some faux-sun tanning) and pink undertones. We chose colors in pinks, browns and mauves and did some highlighting, gentle contours and added a hint of drama in the eyes to open them up and provide balance to the face. Just before the final shot, the model preferred to add her own few coats of mascara as she was going out for the evening with friends and other bridal party members for a night on the town;) Here is the final look:

The Bride-to-be has since reported back that not only did her makeup last all night long (and then some!) but that she was very excited and happy with all the compliments she received. With a few minor adjustments, the wedding day makeup will be flawless, natural and bring out the best in her already gorgeous features.
For a complete product list and instruction sheet on how to complete this look, or to schedule your Bridal Trial makeup (free lashes included) , please comment and I will get back to you with complete details.
Individual and Group makeup lessons for Wedding makeup also available at your location. Great idea for Bridal Parties! Reasonable fees and convenient scheduling. Evenings and weekends are available.
Kristine Marie
~ Urban Decay Lip Primer Potion, A Review ~
September 8, 2009
Urban Decay , known for it’s top quality Eye Primer, has recently offered a few new primer products including an all over face primer and the lip primer (pictured above). What’s a primer you ask? Well, in the simplest of explanations, a primer is a product designed to seal, smooth and prepare the skin for cosmetics giving a smoother application and longer wear. Perfect for days when you want a budge-proof result. Think of primer products as underwear for your makeup;)

I picked up the handy dandy Lip Primer in an effort to make my “cheap” lipcolors stay on a bit longer. I have been experimenting with my Lip Primer and different products from lipcolors to lipglosses and have been quite impressed.
The packaging is classic Urban Decay style -A trendy looking slim metallic tube with the signature purple design and etched design. The product itself is a cream color bullet that twists up and out. It is a bit thick..the consistency of a wax based balm. With a little pressure, this slides right on…invisibly.
I expected it to feel drying, but to my surprise, it was not. I will stress the importance of exfoliated and well moisturized lips to make this your result as well. The product does contain vitamins A, C and nourishing E as well as an SPF of 15.
I usually give it a few moments to set in as I press my lips together gently, then apply my lipcolor on as usual. My lipcolor seems more vibrant, goes on smoother and lasts SO much longer without touch ups. No cracking, fading, or bleeding. I am impressed!
You can find this product here:
So, stop wasting money on buying more lip products. Get the one that makes them all worthwhile and turn any everyday lip product into an *All Day* Product;)
Kristine Marie

